Valve Body Modification Procedure
1. Remove the side oil pan and valve body.2. Inspect the solenoid wire/terminal condition. Repair or replace if needed. The solenoids are serviced as an assembly, consisting of all 4 solenoids.
3. Disassemble and clean all components. Refer to the 1989 Probe Shop Manual, Page 17-01-145 for valve body detail.
NOTE: REPLACE THE VALVE BODY ASSEMBLY IF ANY OF THE FOLLOWING VALVES ARE STICKING. THE PRESSURE REGULATOR VALVE, THROTTLE MODULATOR VALVE, THROTTLE VALVE OR THE LOW REDUCING AND BYPASS VALVE.
Figure 3:
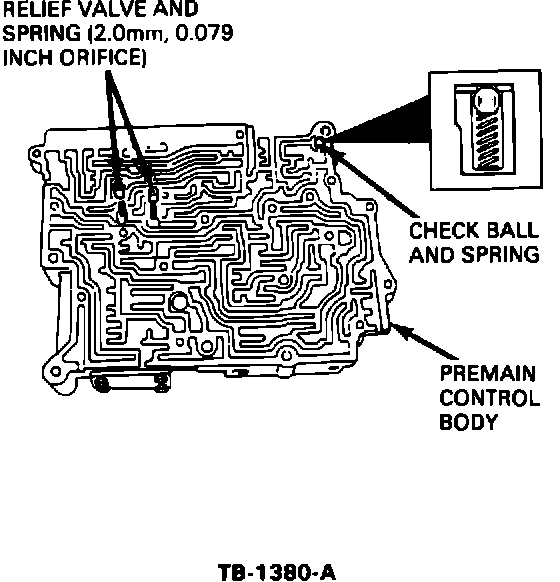
4. Remove and throw away the .079" valve-orifice check and spring, Figure 3. The valve orifice and spring on the right is to remain in place.
Figure 4:
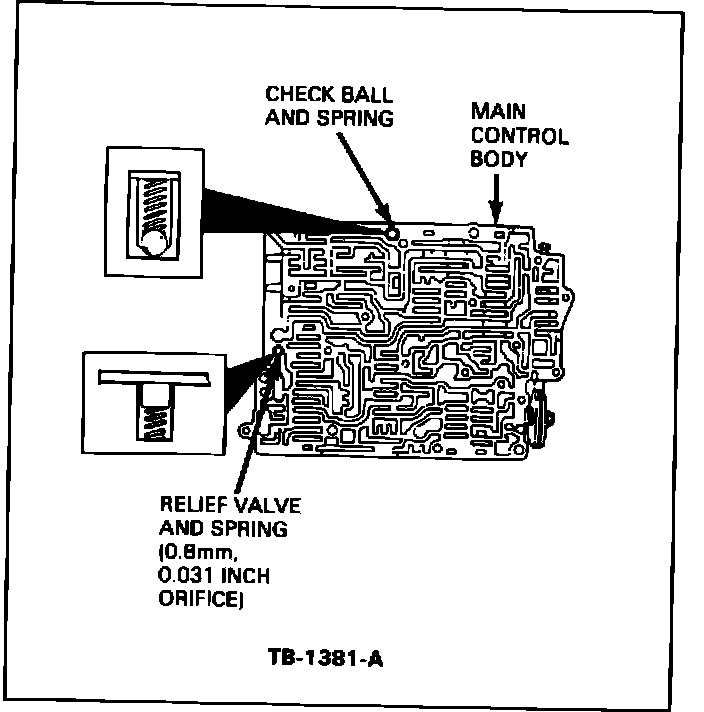
5. Remove the steel ball and spring, Figure 4.
6. Install the resin ball and new spring included in the kit in place of the steel ball and spring removed in Step 5.
7. Re-assemble the valve body with the following new components included in the kit:
^ Revised Pre-main control
^ Bypass spring
^ Front control assembly
^ Separator plates and gaskets.
8. Install the valve body into the transaxle.
9. Adjust the 2-4 band as follows:
a. Remove the lower oil pan.
b. Loosen the lock nut.
c. Tighten the adjuster rod to a torque of 96 lb.in. (11 N-m).
d. Back off the adjuster 2 full turns.
e. Tighten the lock nut to a torque of 18-29 lb.ft. (24-39 N-m).
10. Adjust the transaxle line pressure as follows:
a. Bring the vehicle up to normal operating temperature.
b. Raise the vehicle on a hoist.
c. Remove the left front tire and wheel assembly from the vehicle.
d. Remove the six (6) screws holding the splash shield to the inner wheel well.
e. Remove the square head plug from the transaxle case. The plug is marked with an "L".
Figure 1:
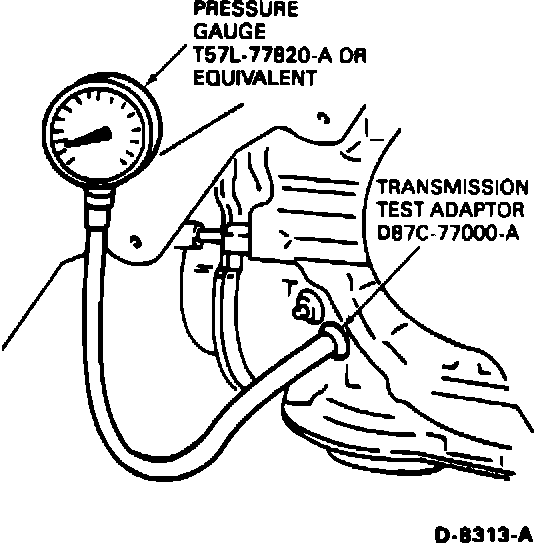
f. Install the Rotunda Transmission Test Adapter 014-00456 into the hole where the square head plug was removed and install Pressure Gauge T57L-77820-A on the Transmission Test Adapter, Figure 1.
g. Partially lower the vehicle.
h. Loosen the locknuts on the throttle cable.
i. Apply the parking brake.
j. Place the transaxle in "P" park and idle the engine at 700-800 RPM.
k. Leave the tranxaxle in "P" Park.
Figure 2:

l. Adjust the line pressure to 66 psi by moving the locknuts either clockwise or counter-clockwise, Figure 2.
NOTE: CLOCKWISE MOVEMENT WILL INCREASE LINE PRESSURE. COUNTER-CLOCKWISE MOVEMENT WILL DECREASE LINE PRESSURE.
m. Tighten the locknuts on the throttle cable.
NOTE: WHILE WATCHING THE PRESSURE GAUGE, MOMENTARILY INCREASE THE ENGINE RPM. THIS SHOULD INCREASE THE PRESSURE READING ON THE GUAGE. MAKE SURE THAT THE PRESSURE READING IS STILL AT 66 psi WHEN AT IDLE. REPEAT THIS AT LEAST THREE (3).
n. Raise the vehicle.
o. Remove the transaxle test adaptor and pressure gauge.
p. Re-install the square head plug in the transaxle case.
q. Re-install the splash shield in the inner wheel well.
r. Re-install the left front tire and wheel assembly.
s. Lower the vehicle.
t. Road test for proper shift patterns.
NOTE: IF THE VEHICLE HAS HARSH OR SOFT SHIFTS AND WAS BUILT PRIOR TO JULY 1988, REPLACE THE 4EAT ELECTRONIC CONTROLLER.