Camshaft: Service and Repair
Camshafts Replacement:

REMOVAL
1. Remove intake manifold.
2. Remove cylinder head valve covers.
3. Remove timing belt.
4. Remove camshaft pulley lock bolts, then the pulleys.
Aligning Camshaft Knock Pins And Cap Marks:
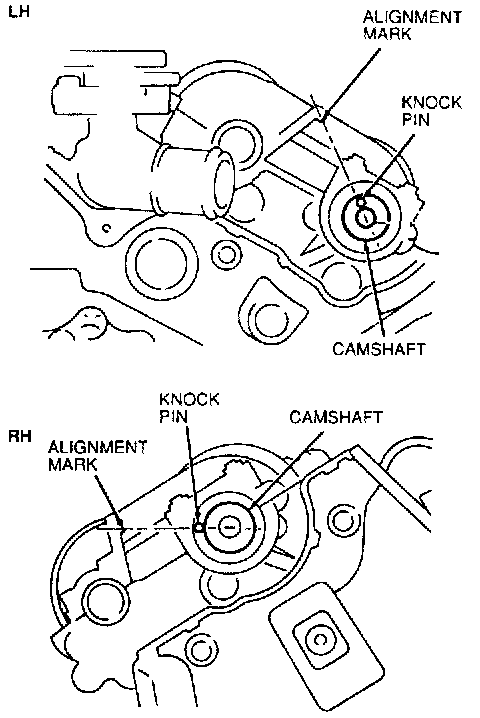
5. Turn camshafts until knock pins are aligned with marks on camshaft caps. This will reduce pressure on hydraulic lash adjusters.
CAUTION: Do not remove camshaft when lobes are depressing any adjusters, as damage to camshaft or thrust journal support may result.
Removing Front Camshaft Cap Bolts:

6. Camshaft caps are identified on righthand bank (rear) by numbers and on lefthand bank (front) by letters. Loosen lefthand (front) camshaft cap bolts in five or six steps in sequence as shown.
Removing Inside Camshaft Cap Bolts:
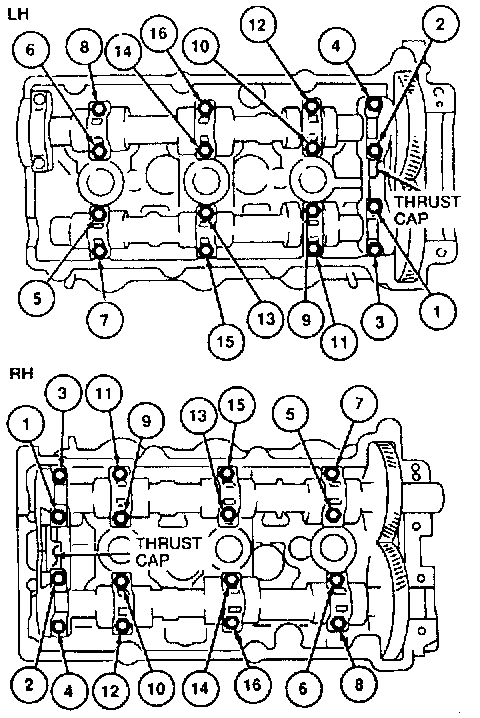
7. After removing left (front) camshaft caps, remove remaining camshaft cap bolts in sequence shown.
8. Remove camshaft caps and camshafts, then the oil seals from camshafts.
CAUTION: To avoid damaging cylinder head thrust bearing support, remove thrust caps last.
INSTALLATION
1. Install new oil seals on camshafts, then apply clean engine oil to camshaft journals and supports.
2. Install camshafts so gear marks align.
Sealant Application Areas:
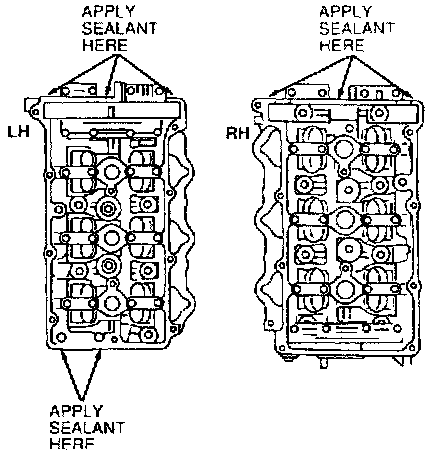
3. Apply a light coat of sealant to areas shown. Do not allow sealant to contact the camshafts.
4. Install thrust caps and tighten bolts until they are fully seated against cylinder head.
Camshaft Cap Bolt Tightening Sequence:
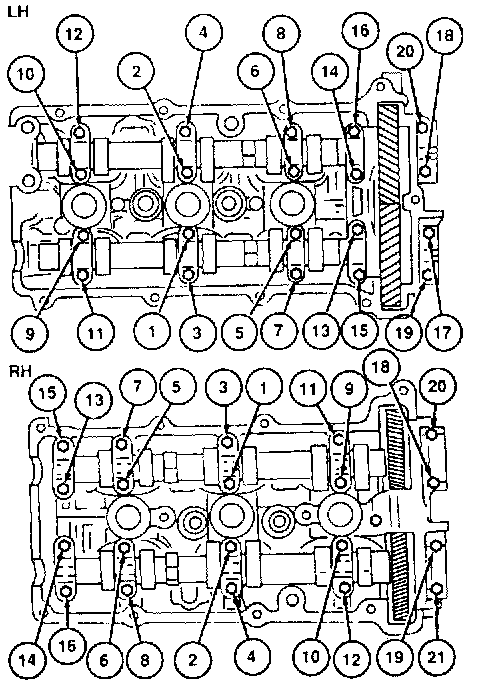
5. Install remaining camshaft caps, noting the following:
a. Right (rear) bank caps are numbered and left (front) are lettered.
b. Torque camshaft cap bolts to 8-10 ft lb in five equal steps, following sequence.
6. Holding camshafts in place with a suitable wrench, install camshaft pulley and pulley lock bolts, then tighten lock bolts to 90-103 ft lb.
7. Install timing belt, cylinder head valve covers and intake manifold.