Master Cylinder, ABS
(Part 1 Of 2):
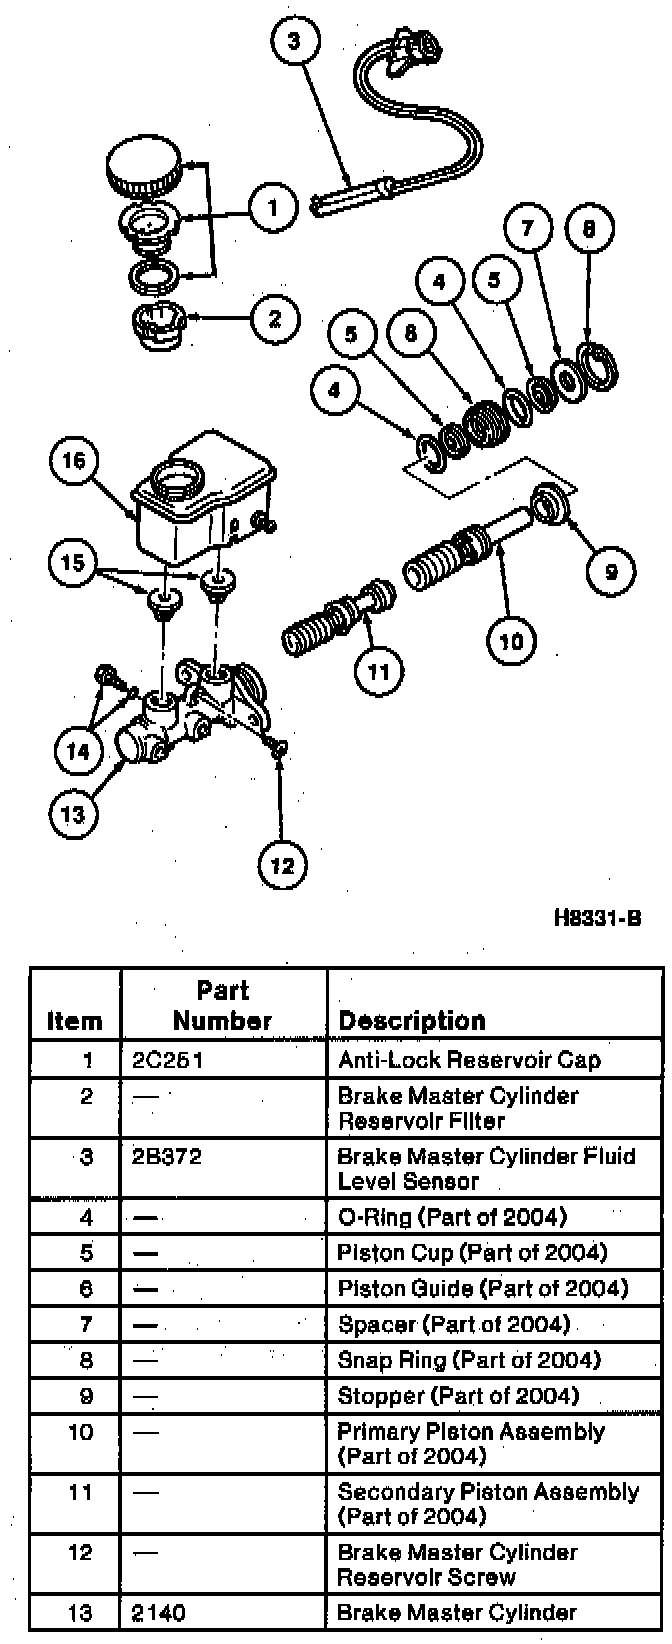
(Part 2 Of 2):
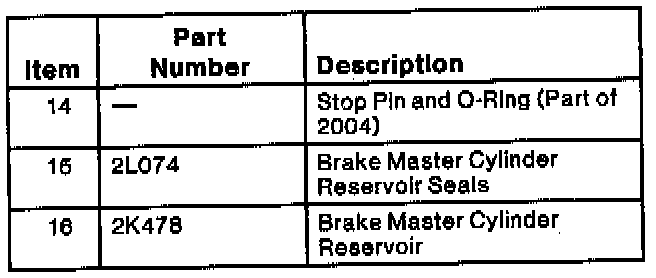
DISASSEMBLY
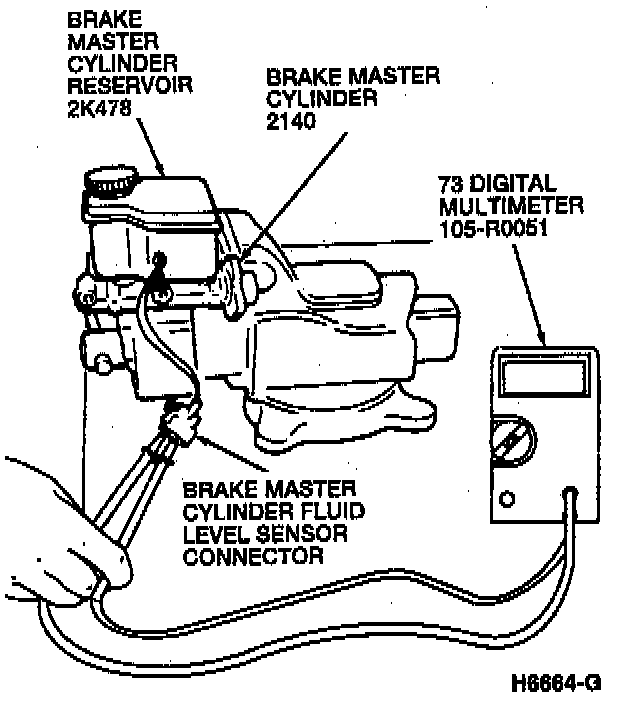
1. Use Rotunda 73 Digital Multimeter 105-R0051 or equivalent to check the continuity of the brake master cylinder fluid level sensor. The brake master cylinder fluid level sensor is open when the brake master cylinder reservoir is full.
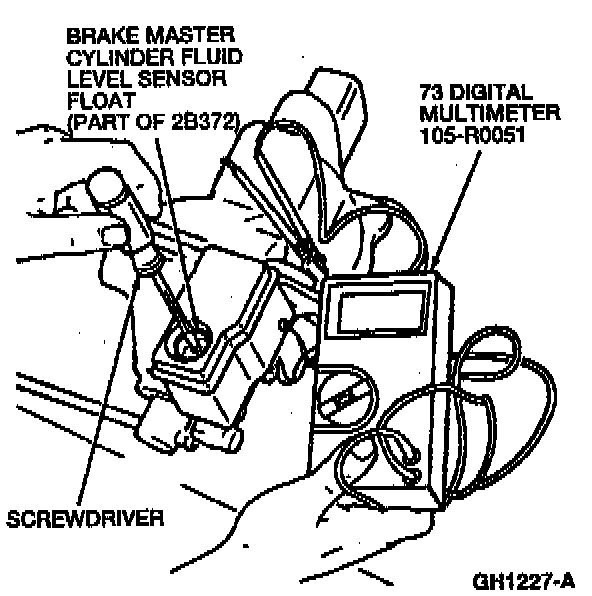
2. Use a screwdriver to push down on the float. Use a Rotunda 73 Digital Multimeter 105-R005 1 or equivalent to check the continuity of the brake master cylinder fluid level sensor. The brake master cylinder fluid level sensor contacts close when the brake master cylinder fluid level sensor float is pushed down.
3. Remove the brake master cylinder fluid level sensor. If the brake master cylinder fluid level sensor is damaged, replace it.
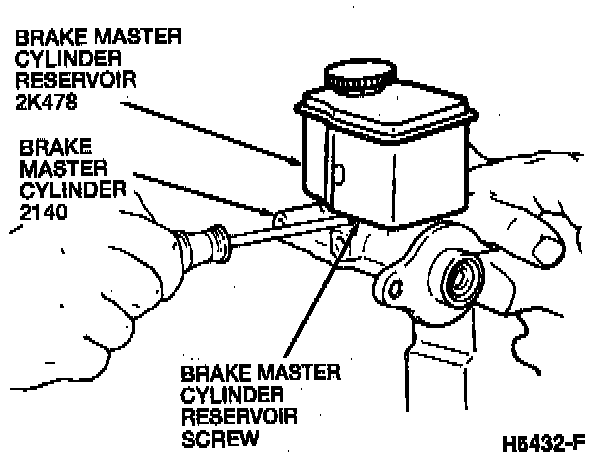
4. Mount the brake master cylinder in a soft jawed vise and remove the brake master cylinder screw.
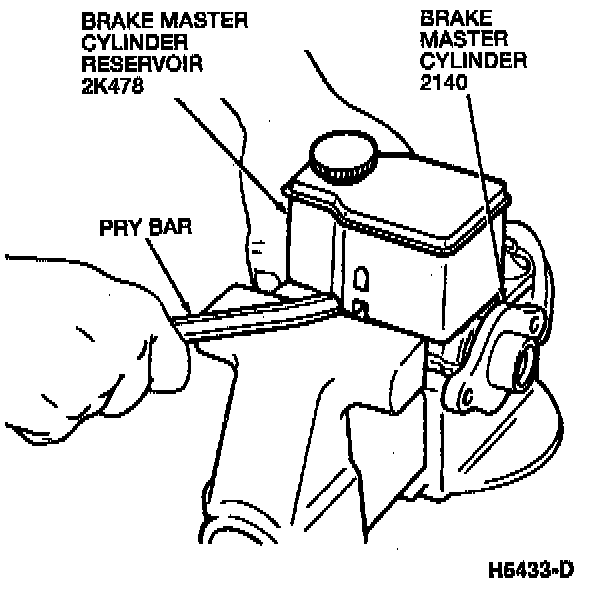
5. Gently pry up on the brake master cylinder reservoir with a small pry bar and remove it from the brake master cylinder.
6. Remove the brake master cylinder reservoir seals from the brake master cylinder.
7. Push in on the primary piston and remove the secondary piston stop pin and O-ring. Discard the O-ring.
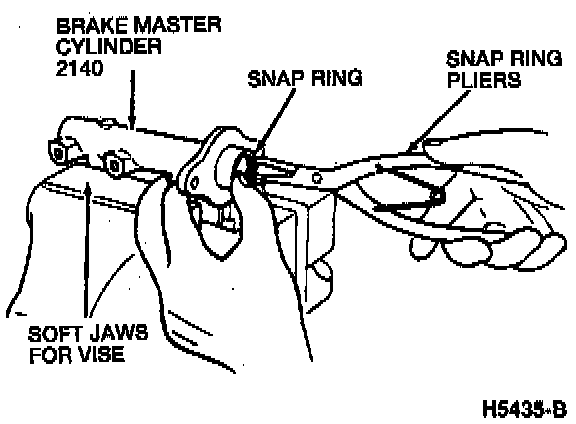
8. Push the primary piston in fully with a rod and remove the snap ring using snap ring pliers. Discard the snap ring.
9. Remove the stopper.
10. Use a small amount of compressed air to push out the primary piston. Be careful to catch the pistons in a cardboard box filled with clean shop towels to prevent damage to the pistons. Use only the minimum amount or air pressure needed to drive out the pistons.
11. Remove the spacer and piston guide from the primary piston.
12. Remove the O-rings and the piston cups. Discard the O-rings.
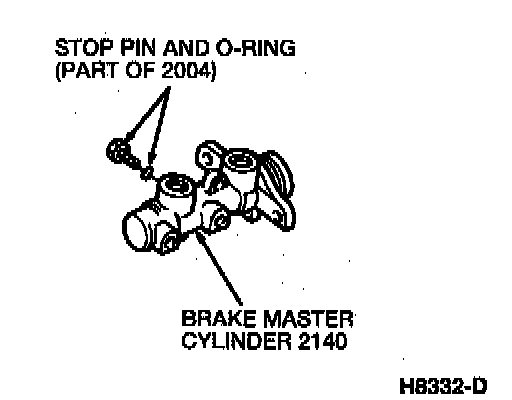
13. Remove the stop pin and O-ring.
14. Remove the secondary piston assembly.
ASSEMBLY
1. Clean the brake master cylinder housing with denatured alcohol. Be sure no residue remains.
2. Lubricate the brake master cylinder bore with the special assembly lubricant supplied in the rebuilding kit or with clean High Performance DOT 3 Motor Vehicle Brake Fluid C6AZ-19542-AB or DOT 3 equivalent fluid meeting Ford specification ESA-M6C25-A, DOT 3.
(Part 1 Of 2):
(Part 2 Of 2):
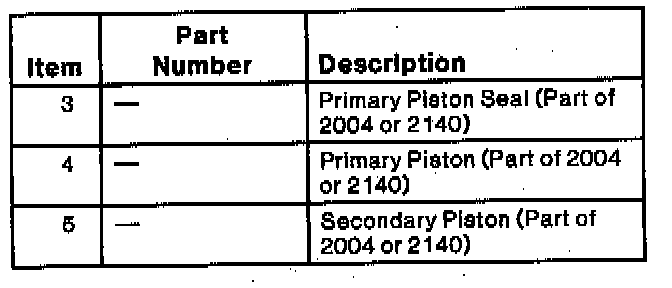
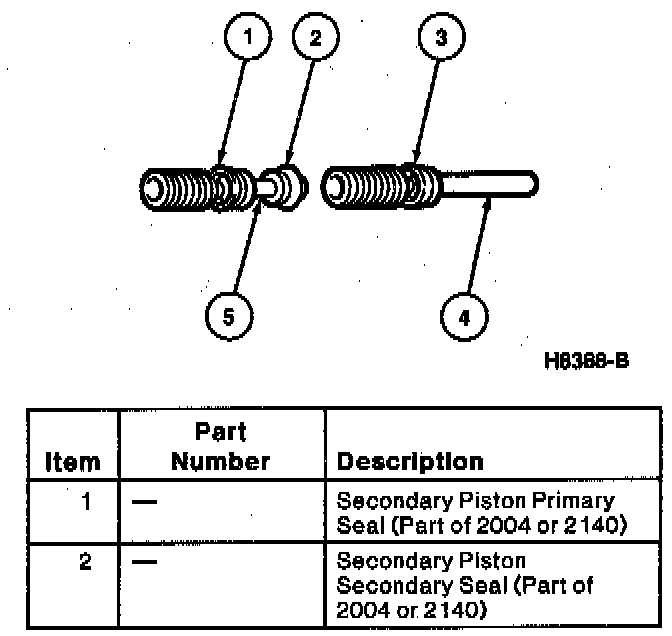
3. Clean the pistons with denatured alcohol and install new seals. Some kits may come with new pistons.
NOTE: Lubricate the seals with clean High Performance DOT 3 Motor Vehicle Brake Fluid C6AZ- 1 9542-AB or DOT 3 equivalent meeting Ford specification ESA-M6C25-A, DOT 3.
4. Install the secondary piston assembly with the piston hole facing the stop pin. Install and tighten a new O-ring and stop pin.
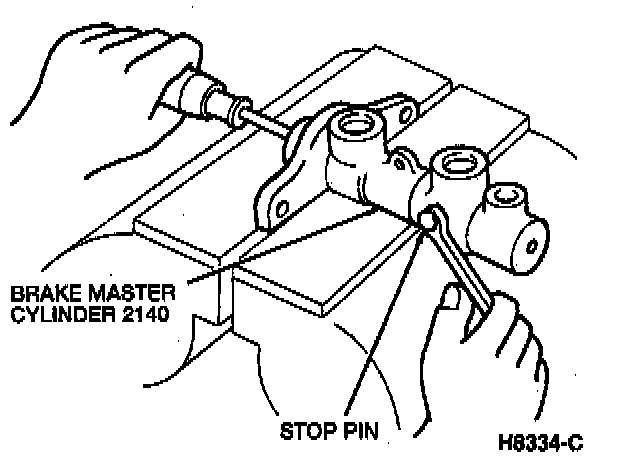
5. Push and release the secondary piston to verify that it is being held by the stop pin or stop screw.
6. Install the primary piston assembly.
7. Install the stopper.
8. Lubricate the piston cups with clean brake fluid and install.
9. Install new O-rings, piston guide and spacer.
10. Install a new snap ring.
11. Lubricate the brake master cylinder reservoir seals with clean brake fluid and install them in the brake master cylinder reservoir.
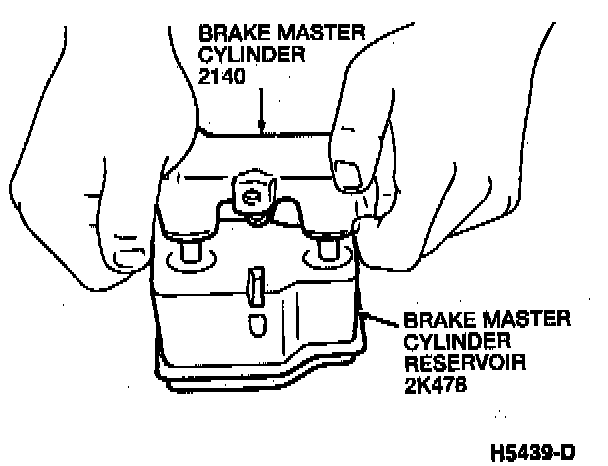
12. Place the brake master cylinder reservoir upside down on a clean work bench and press the brake master cylinder down over the brake master cylinder reservoir.
13. Install the brake master cylinder reservoir screw.
14. Install the brake master cylinder fluid level sensor.