Jumper Lines
SPECIAL SERVICE TOOL(S) REQUIREDDescription Model
Spring Lock Coupling Disconnect Tool (3/8 in.) T81P-19623-G1
Spring Lock Coupling Disconnect Tool (1/2 in.) T81P-19623-G2
Spring Lock Coupling Disconnect Tool (5/8 in.) T81P-19623-C
Spring Lock Coupling Disconnect Tool (1/2 in.) T81P-19623-A
NOTE: Whenever a refrigerant line is replaced, it will be necessary to replace the suction accumulator/drier.
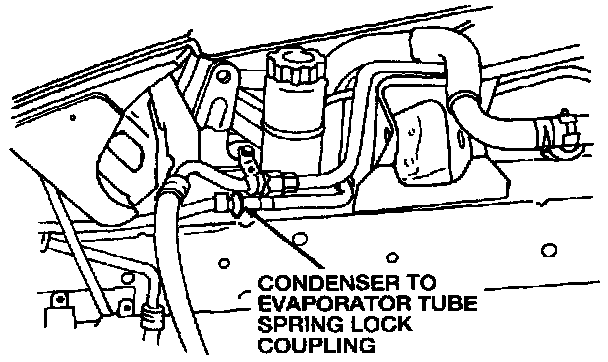
REMOVAL
1. Discharge the A/C system into a proper recovery system. Discharging and Recovery
2. Use an appropriate spring lock coupling disconnect tool to disconnect the condenser to evaporator tube extension spring lock coupling from the condenser to evaporator tube.
3. Remove the front bumper cover.
4. Use an appropriate spring lock coupling disconnect tool to disconnect the condenser to evaporator tube extension spring lock coupling from the from the base of the A/C condenser core.
5. Disconnect the A/C pressure cutoff switch electrical connector.
6. Disengage the hold down clip.
7. Remove the hold-down bracket bolt.
8. Remove the liquid line extension. Discard the O-rings.
INSTALLATION
1. Install the liquid line extension.
2. Using new O-rings lubricated with clean Motorcraft Refrigerant Oil YN-12b or equivalent meeting Ford specification WSH-M1C231-B, connect both spring lock couplings.
3. Install the hold-down bracket bolt.
4. Engage the hold-down clip.
5. Connect the A/C pressure cut-off switch electrical connector.
6. Install the front bumper cover.
7. Leak test, evacuate and recharge the A/C system. Service and Repair