A/C Discharge Hose/Line
SPECIAL SERVICE TOOL(S) REQUIREDDescription Model
Spring Lock Coupling Disconnect Tool (3/8 in.) T81P-19623-G1
Spring Lock Coupling Disconnect Tool (1/2 in.) T81P-19623-G2
Spring Lock Coupling Disconnect Tool (5/8 in.) T81P-19623-C
Spring Lock Coupling Disconnect Tool (1/2 in.) T81P-19623-A
REMOVAL
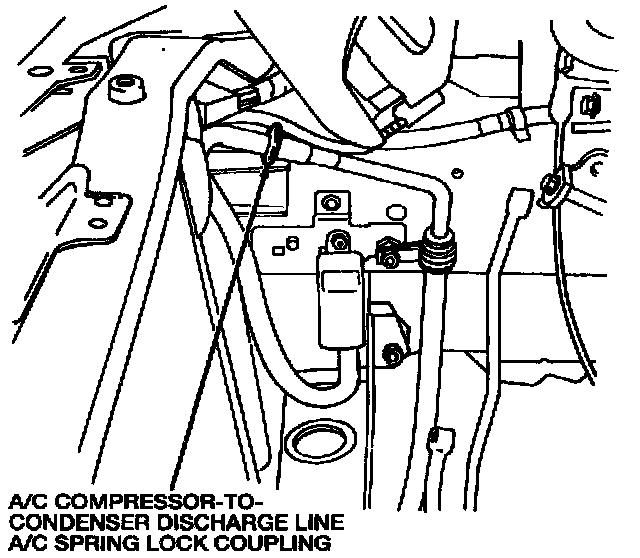
1. Remove the radiator to gain access to the A/C spring tube lock coupling.
2. Raise the headlamps.
3. Discharge the A/C system into a proper recovery system. Discharging and Recovery
NOTE: Whenever a refrigerant line is replaced, it will be necessary to replace the suction accumulator/drier.
4. Use an appropriate spring lock coupling disconnect tool to disconnect the A/C compressor-to-condenser discharge line spring lock coupling near the top of the A/C condenser core.
5. Remove the A/C compressor to condenser discharge line manifold bolt. Discard the O-ring.
6. Remove the A/C compressor to condenser discharge line hold-down bracket nut.
7. Remove the harness from the A/C compressor to condenser discharge line.
8. Remove the A/C compressor to condenser discharge line from the A/C condenser core hardline. Discard the O-ring.
INSTALLATION
1. Using a new O-ring lubricated with clean Motorcraft Refrigerant Oil YN-12b or equivalent meeting Ford specification WSH-M1C231-B, position the manifold and install the manifold bolt.
2. Connect the wire harness to the A/C compressor to condenser discharge line.
3. Install the A/C compressor to condenser discharge line hold-down bracket and nut.
4. Using a new O-ring lubricated with clean Motorcraft Refrigerant Oil YN-12b or equivalent meeting Ford specification WSH-M1C231-B, connect the A/C compressor to condenser discharge line to the A/C condenser core hardline.
5. Install the radiator.
6. Connect the A/C compressor-to-condenser discharge line spring lock coupling near the top of the A/C condenser core.
7. Lower the headlamps.
8. Leak test, evacuate and recharge the A/C system. Service and Repair