Tie Rod End: Service and Repair
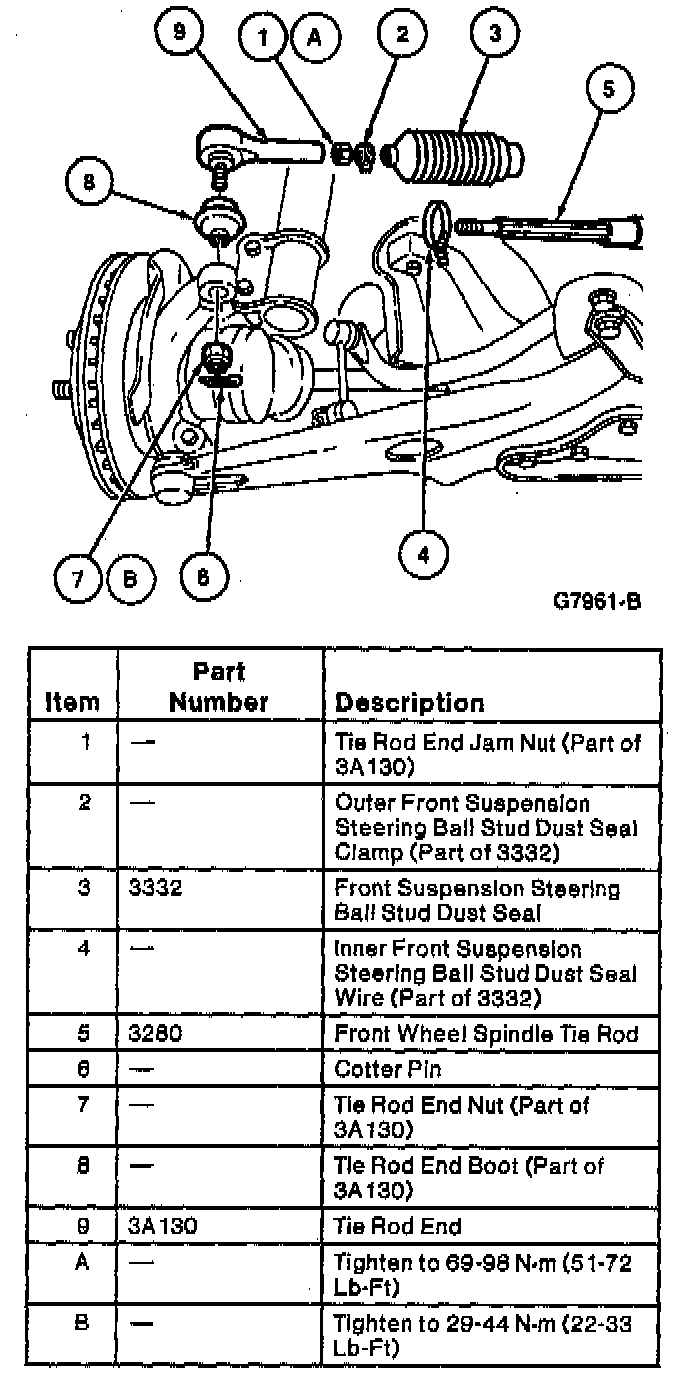
REMOVAL
1. Raise and support the vehicle.
2. Remove the front wheels.
3. Remove the cotter pin and tie rod end nut.
NOTE: If the tie rod end does not separate easily, give the front wheel knuckle a sharp blow with a brass hammer to shock the taper.
Tie Rod End Remover Tool:

4. Use Tie Rod End Remover TOOL-3290-D or equivalent to separate the tie rod end from the front wheel knuckle.

5. Paint or make alignment marks on the tie rod end, tie rod end jam nut, and front wheel spindle tie rod.
6. Loosen the tie rod end jam nut.
7. Remove the tie rod end.
INSTALLATION
1. Thread the tie rod end onto the front wheel spindle tie rod.
2. Align the alignment marks on the tie rod end, tie rod end jam nut, and front wheel spindle tie rod.
3. Tighten the tie rod end jam nut to 69-98 Nm (51-72 ft. lbs.).
4. Install the tie rod end in the front wheel knuckle.
NOTE: If necessary, tighten (never loosen) the tie rod end nut until the castellations line up with the pin bore.
5. Tighten the tie rod end nut to 31-44 Nm (23-33 ft. lbs.).
6. Install a new cotter pin.
7. Install the front wheels. Tighten the lug nuts to 88-118 Nm (65-87 ft. lbs.).
8. Lower the vehicle.
9. Check the vehicle alignment.