Pressure Plate: Service and Repair
REMOVAL1. Remove the transaxle.

2. Install Flywheel Holding Tool T74P-6375-A, as shown, in a transaxle mounting hole on the engine and engage the tooth of the locking tool into the flywheel.
3. Remove the bolts attaching the clutch pressure plate to the flywheel, and remove the clutch pressure plate.
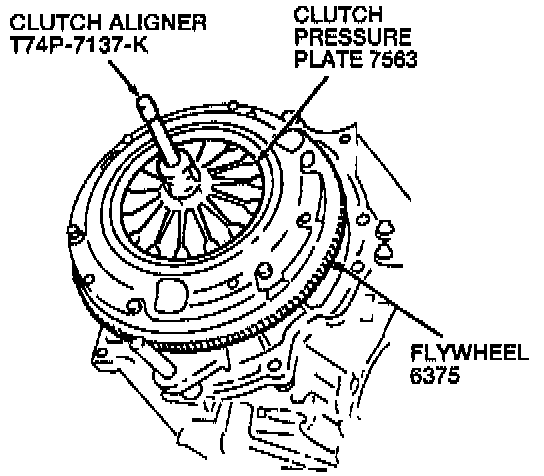
NOTE: Use Clutch Aligner T74P-7137-K to avoid dropping the clutch disc when the bolts are removed from the clutch pressure plate.
4. Remove the clutch disc and the Clutch Aligner T74P-7137-K.
NOTE: Do not remove the pilot bearing if it is not necessary.
INSTALLATION
NOTE: Check the clutch pressure plate for defects or damage and replace if necessary.
1. Clean the splines on the clutch disc and the input shaft and apply a small amount of Premium Long-Life Grease XG-1-C or XG-1-K or equivalent meeting Ford specification ESA-M1C75-B to the clutch disc and input shaft splines. Avoid getting grease on the clutch disc face.

2. Install the clutch disc using Clutch Aligner T74P-7137-K.
NOTE: Install the clutch disc facing in the direction shown.
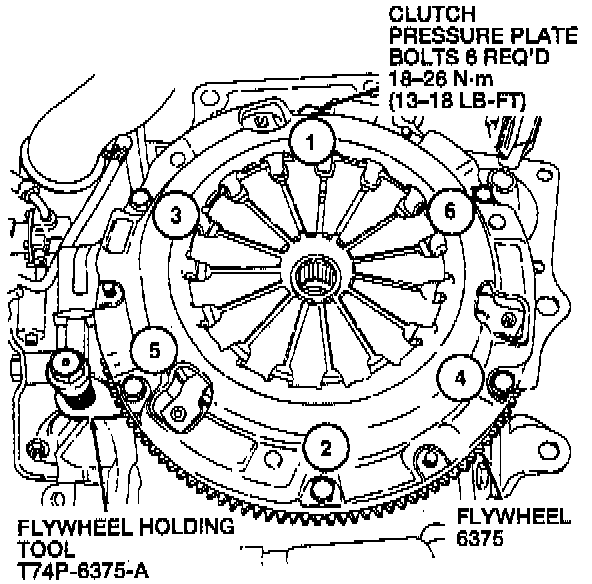
3. Install the clutch pressure plate. Tighten the clutch pressure plate bolts to 18-26 Nm (13-18 ft. lbs.) in the sequence shown. Use Flywheel Holding Tool T74P-6375-A to hold the flywheel while tightening the bolts.
4. Install the transaxle.